


How to Make Paper Flower Frame with Memory Glue
With all of the online shopping most of us are doing these days, it’s probably safe to say that cardboard boxes are piling up! Instead of tossing them, upcycle your cardboard into a sensational spring craft that also makes a great gift for Mother’s Day, birthdays and more. Oh Yay Studio will show you how to use Aleene’s Memory Glue to create a paper flower frame that’ll keep sunny spring cheer going all year long. Let’s get your creativity blooming!
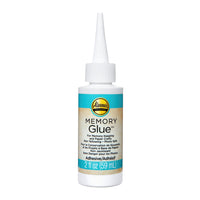
What you need:- Aleene’s Memory Glue
- Cardboard box
- Cardstock papers – colors of choice
- Scoring tool (or even a pen cap for scoring and creasing)
- Scissors or straight edge for cutting cardboard
- Photos
- FREE SVG Files from Oh Yay Studio
Step 1

This fun spring craft is going to help you upcycle those cardboard boxes into something new and blossoming with color! Before you get started, make sure at least one side of your cardboard doesn’t have printing on it. (Or you could always paint it too, if you want to add some extra color.)
Step 2
First cut out the frame to fit the photograph you have in mind. You can make your frame any size and shape that youd like. Oh Yay Studio cut two pieces one for the front of the frame and one for the backing. For sizing youll want to cut out the opening for the front piece to fit your photo, plus a few inches of border. Note: You dont need to have two pieces for your frame, but its an option!
Step 3
Download the SVG file (linked in the supply list) for the flowers and cut out as many as desired from your different colors of cardstock. Note: The flower SVG file has 3 layers per one finished flower. (You will see the variation on the shapes, but keep in mind that you will need one of each shape to complete one flower). You can adjust the sizes to be as large or small as youd like within your design space; just make sure you are sizing all three layers at the same time so that they can be layered appropriately after cutting out.
Step 4
Prep flowers and petals by giving them shape. Using a pen or paintbrush, begin to roll the edges of the flowers to give them movement and life.
Step 5
For the stems with leaves, use a scoring tool to gently score the center of each leaf.
Step 6
Then lightly crease the center-most sections and fold the sides upward to give the leaves dimension as well. This spring craft is starting to come to life!
Step 7:
Now its time to start gluing all of your floral pieces together! For the flowers, start with your largest base piece, add a dot in the center, then press the next piece in place on top.
Step 8
Repeat this process for each layer. Have some creative fun with this part of your spring craft! You can mix & match the colors for your layers, or make your flowers all one color its totally up to you!
Step 9
Save your leaf pieces to glue to the base of the frame so you can move and arrange them how you like before gluing to the flowers. Let the flowers dry before you start gluing everything to the frame.
Step 10
It helps to experiment with the arrangement of your flowers before you start gluing them in place on the front of your cardboard frame. You might even decide you want MORE flowers and need to create a few extra. It is a spring craft, after all!
Step 11
Once you have the placement more or less figured out, start gluing your flowers and leaves onto the frame. Remember, for those flowers where you are adding leaves, glue the leaf part onto the frame first, then layer the flowers over the top.
Step 12
If youre using a back piece for your frame, glue the photo in place on the back piece, making sure it will be centered when you place the front piece on top.
Step 13
Next glue the top of the frame with the flowers in place over the back piece, sandwiching your photo in between. Let this fun spring craft completely dry before gifting or putting on display!
Step 14
This flower frame is one youll want to keep on display all year long! It would make a great gift for the moms in your life for Mothers Day, a birthday or any day just to brighten their day!
Step 15
Aleene's Memory Glue was made specifically for paper projects, photos and other memory keeping DIYs! What other spring crafts are you thinking of making with Memory Glue? Tag us on social @aleenesdiy and share your creations with us!
