No-Sew Fringe Clothing DIY with Fabric Glue
Fringe accents are back in a big way, and we’re all about this fun textured trend. From handbags to denim jackets, shirts and home décor, adding fringe to your fabrics is so easy, and you don’t have to know how to sew to make it happen. In this clothing DIY, Annie Papi will show you how to glue fringe to fabric using the Aleene’s Fabric Fusion Dual-Ended Glue Pen!
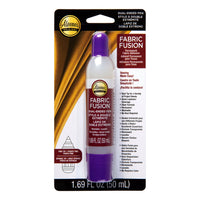
What you need:- Aleene’s Fabric Fusion Dual-Ended Glue Pen
- Button-up shirt or desired fabric item
- Fringe trim
- Scissors
- Clothespins
Step 1

If your fabric item is washable (like clothing), make sure it’s been washed and dried without fabric softener before getting started. You’ll want to ensure that anything that could prevent the glue from properly adhering to the fabric has been washed away!
Step 2
This clothing DIY really is as easy as gluing fringe trim onto a shirt, skirt, jacket or other item! Measure and cut the length of fringe trim youll need depending on where you will be gluing it. Annie wanted to run fringe across the entire back of her shirt, as well as along the edges of the front pockets.
Step 3
Once you have the fringe cut, simply run a thin line of Fabric Fusion along the top edge of the fringe trim, and press in place on your clothing. Remember, less is more with fabric glue. Too much glue can oversaturate the fabric and cause issues with adhering. You can also use clothespins or sewing pins to help hold the fringe in place as it dries.
Step 4
Once the glue dries, your fringe is ready to rock. And thats it for this fringe clothing DIY! Such a simple process that makes a fab fashion statement.
Step 5
Annie took her fringe top to the rodeo! How are you accenting your outfits and accessories with fringe and Fabric Fusion? Tag us on social @aleenesdiy and share your clothing DIYs with us!