
DIY Easter Décor: Colorful No-Sew Felt Carrots with Aleene’s Fabric Fusion Tape
Easter is just around the corner! This super cute and simple tutorial from Oh Yay Studios will teach you how to add color to your Easter décor with the help of Aleene’s Fabric Fusion Permanent Fabric Tape. If you’re a fan of DIY Easter décor, this project is perfect for using up any extra felt scraps that you have laying around— even the Easter bunny won’t be able to resist these colorful felt carrots!
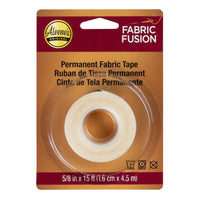
What you need:- Aleene’s Fabric Fusion Permanent Fabric Tape
- Felt, various colors
- Scissors
- Polyester fiber fill or cotton balls
Step 1

Before you start on this DIY Easter decor project, pick your felt carrot colors and pair them with colors for the top greenery. Cut out your carrots - you will want two of each color to make one carrot.
Step 2
Cut out your carrot top greenery by cutting out 2 pieces of felt that are 3 x 5. Cut small long slits along the 5 side in the greenery tops to make the flowing strands. Be sure to leave about 1 inch at the bottom of each greenery piece uncut so that you can add tape and adhere it to the carrot.
Step 3
Measure and cut a piece of your Fabric Tape the lengthwise of the carrot, including the top curve. Carefully peel off one side of the paper and stick the tape along the inside of the carrot, as flush to the edge as possible. Then peel away the remainder of the paper off the Fabric Tape and fold to follow the curved edge of the carrot.
Step 4
Begin pressing two carrot sides together, one with Fabric Tape and one without. Add polyester fiber fill or cotton when the carrot is about three-fourths of the way closed, then press the edges together on the long sides to close completely. Leave the top of the carrot unsealed to add greenery.
Step 5
Layer your 2 carrot greenery colors on top of one another and add a piece of Fabric Tape between the layers at the bottom uncut portion. Cut and stick another piece of Fabric Tape to the bottom of the greenery, then roll together.
Step 6
Cut a final piece of Fabric Tape to wrap around the outer bottom part of the greenery, then carefully insert into the top of the carrot. Press to secure. Fluff your carrots as needed, and your DIY Easter decor is ready to be displayed!
How are you using Aleenes Glues for your DIY Easter decor projects? Show us your creations on social media @AleenesDIY!