Fairy Door DIY with Wood Glue
You don’t need a green thumb to help your garden sprout some extra charm … give it a magic touch with Aleene’s Wood Glue! Get inspired (or enchanted) to spread your creative wings with this fun fairy door tutorial from Lucia Mallea.
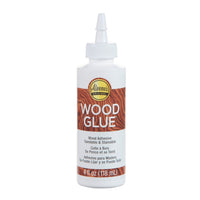
What you need:- Aleene’s Wood Glue
- COLORSHOT Premium Spray Paint – desired color
- Wood craft sticks
- Scrap paper
- Tree twigs
- Moss
- Faux flowers
- Craft knife
Step 1

This easy DIY fairy door tutorial from Lucia Mallea only requires a few simple supplies for such a fun way to enhance your garden (or another place in your home where fairy friends are invited)!
Step 2
The wood craft sticks will be used to construct your fairy door. Apply Wood Glue to the entire side edge of a craft stick and press the side edge of another stick into the glue.
Step 3
Continue gluing craft sticks together until you have the width you would like for your fairy door.
Step 4
Let the sticks dry completely, and cut out an arch from your scratch paper to use as your door template.
Step 5
Once the Wood Glue dries, use your arch template to trim around the craft sticks so they are in the shape of a door.
Step 6
Working in a well-ventilated area, spray paint your fairy door any color you like! (Or any color that your fairies will like!)
Step 7
Use a craft knife to score the door with small cuts to create texture like youd see on an old wood door.
Step 8
Break or trim your twigs to fit around your door, then use Wood Glue to glue them in place, framing the door.
Step 9
Dont forget to cut small pieces of twig to create hinges and a door handle! Next glue moss and flowers where ever you like on the door to create pretty nature accents. Let everything dry completely.
Step 10
Place your new fairy door in your garden or another special spot to invite cute little fairies and gnomes to come and visit! How would you use Aleene's Wood Glue to customize your own fairy door? Make sure to tag us on social @aleenesdiy and share your creations with us!


